
When I first started painting miniatures, I honestly didn’t know that my ‘just for fun’ hobby would make me a legit hoarder of painted miniatures so quickly. But yeah, that happened.
It was all fun and games until I realized that I needed to take care of these guys if I wanted them to last. Not only did I have to find a way to store them properly but I also had to find one to transport them for my occasional trips to the gaming store. One has to show off his miniature army, after all, right? 🙂
If you’re reading this, you must be able to relate!
To me, these are the best ways to safely transport miniatures:
- Foam: Some form of foam to pack them in and keep them safe. Simply put them in a case or box and some foam around them. If your miniature has a lot of long thin pieces like swords, wing, tails, then foam might be harder to do.
- Magnets or Sticky Tack: Something to put on the base of your miniature that will keep it in place. A magnet glued to the bottom and place the mini on a metallic tray to keep it steady. Alternatively, some sticky putty on the bottom and stick it to pretty much anything.
When I started looking for ways to store and transport miniatures safely, I noticed that many people simply store their unpainted miniatures in zip-lock bags. However, once you paint them, this isn’t an option anymore unless you don’t mind chipping and scratching the paint off.
I even came across some people who simply threw their miniature figures into tackle boxes or stacked the models on top of each other in a cardboard box. Even the unpainted ones are not safe there!
I was horrified. I knew I had to protect my army.
Luckily, I came across some DIY tricks for storing and transporting miniatures – I’ll share them all below along with some product suggestions if you’d rather save time and step it up.
So, if you’re worried about damaging or compromising the condition of your miniature figures while storing or transporting them and are looking for tried and tested ideas to keep them safe, dive in!
1. The Pluck Foam Idea
Have you ever had a chance to work with pluck foam?
If not, let me tell you how it works.
Basically, it’s a foam tray with a grid semi-cut into the foam. It allows you to pluck out individual pieces of any desired shape. This means that you can get the exact shape of your miniature figure!

Just a heads up, once you pluck a piece, you can’t put it back. So, make sure you know what you’re doing.
What I do is that I hold my miniature figure over the foam and sketch an outline of its shape on the foam using a marker. Then I can just pluck the piece of the foam I just traced! This trick not only gets a near-perfect fit for the mini but also saves space for other figures.
The best thing about this storage option is that isn’t too costly.
Suggested Product:
The Pelican 1500 Middle Pluck Foam is a great option available for just Amazon product! It is made of high-quality material to ensure maximum durability and strength. A strong border surrounds the pull n pluck cells and the entire unit fits quite well.
2. Get Pre-cut Foam
If the idea of customized foam storage for your painted miniatures doesn’t fascinate you, you might want to buy pre-cut foam.
As the name suggests, this foam has specific shapes already cut for your minis. You’ll have to check the product online and choose one that’s specifically designed for your unit. This also means that you might find it less flexible when it comes to finding a spot for a new model, especially if you have those spikey Carnifexes and Trygons in your army!
On the bright side, the foams allow you to store and carry multiple models in one segment. Just make sure you handle it carefully or even better, put a sheet of bubble wrap between them to prevent them from bumping as you drive.
Suggested Product:
The 2” Figure Pre-cut Foam Tray comes with 40 slots to store and transport miniatures safely. It’s the ideal size to fit in all standard-sized bags. Priced at $11.95 only, it’s made from high-grade, soft material and is sturdy enough to protect your army from all kinds of damage.
3. Find the Perfect Carrying Case
This is my preferred method. A simple carrying case get’s me through quite well. I’ll give you a quick and easy DIY version and some other options.
Honestly, you can get a random box from around the house, maybe an Amazon shipping box, and put some foam like the pre-cut one shown above in there.
The trick is to arrange your trays strategically. Ideally, it’s best to place the heaviest or biggest foam tray at the bottom for a strong base. The little, lightweight figures should go towards the top!
Now, if you think a cardboard box isn’t really your type, I have an alternative idea for you.
What do you think about those carrying cases that are specifically designed to carry minis?
These cases are pretty durable and look great. They’ll definitely do the job and you won’t have to worry about it. You can easily place your foam trays in them and carry them around with maximum ease and convenience.
Suggested Products:
The Games Workshop Warhammer: Citadel Carry Case can carry up to 20 miniature figures. Made from rigid foam, it offers optimal protection for your army. For an extra layer of security, it features a zip around the borders. The case’s interior has a layer of channel foam to protect the miniatures from damage.
Another great choice is the Feldherr Mini Plus Miniature Case that accommodates up to 64 figures sized 25 mm. The bag is made from superior-quality material and has a small handle, making it easy for you to carry and move around. It comes with 4 foam sheets with 16 compartments each. The foam is made of the finest acid-free material, offering soft, secure spaces for the miniatures.
4. Try the Magnetic Boards
If you feel storing your painted miniatures in the foam trays will make them look less ‘cool’, I’m sure you’ll love the magnetic board idea!
Now, this idea can be as cheap and expensive as you want to make it. If you have a tight budget, you can simply use whiteboards or cookie sheets for magnetizing your minis. On the other hand, if you don’t mind spending some extra bucks, you can get custom-designed carrying cases.
First, let’s get done with the magnetizing process, which is super easy. The goal here is to get a magnet stuck on the bottom of the miniature. The base is the platform the mini stands on. It’s typically round but sometimes can be square, hexagonal or any other shape.
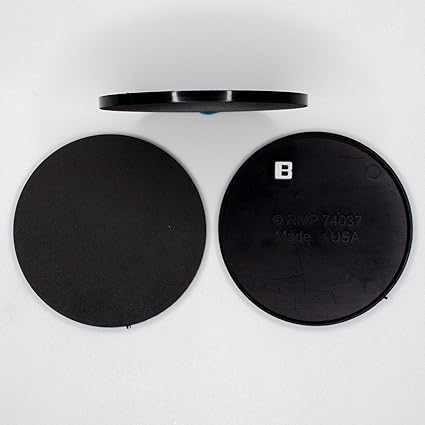
Most of my miniatures have a thick but hollow base like these from Reaper. These magnets work best for minis with a hollow base, you simply glue them inside the hollow part underneath the miniature base.

If your base doesn’t have this concave area, you’ll have to improvise a bit with some small, thin, round magnets like these. So for example with a base like these below, just glue the magnet to the bottom of it:
Once you have the magnets on you attach the base to a metallic surface and voila, your magnetic board is ready to accommodate your miniature army!
That being said, make sure that you use a good-quality magnet that’s strong enough to hold your miniature figures.
You can also use this technique with a display board. Simply install the board at your desired spot, throw on some magnets, and stick your minis for a beautiful display!
By the way, using magnets like this also makes for a great way to paint your minis. I have seen a lot of people start with adding a magnet, then using a holder with another magnet on it, or metal, and using that as a painting handle. Sweet.
Suggested Products:
5. Use a Baking Tray and Some Magnets
You can also use a baking tray and some magnets to store and transport miniatures safely.
All you need is:
- A baking tray
- Tupperware (or other plastic food storage container) with a lid for storing the baking tray
- Magnets
- Superglue
- Accelerant
Although Tupperware isn’t a requirement for this method, it’s recommended. Make sure the baking tray fits it perfectly to prevent excessive movement. If you can’t seem to find an ideal set, consider gluing some foam around the edges to create a resting space for the baking tray.
The baking tray is supposed to serve as a ground on which your miniature figures stand with the help of the power of magnets. If it’s not made of metal, consider gluing the negative side of the magnets beneath the tray and then the positive side facing downwards at the base of the minis.
On the other hand, if magnets can stick to your baking tray, well and good! You can then simply apply some glue to the base of your minis and stick the magnet on it after spraying some accelerant to speed up the process. Once the glue is all dried up and the magnet is properly stuck in its place, place the miniature figure on the baking tray. Ideally, you should be able to flip the tray without the minis falling off!
Now Get Those Minis Protected!
Trust me when I say, you can save quite a few dollars by following these DIY tricks for storing and transporting miniatures. I have seen so many people storing and transporting their miniature models poorly just because they don’t want to spend any money on foam trays and carrying cases that can be spent on buying new models instead.
Me personally, I just went for a nice case hah. I rationalize it by saying I spent a lot of time and money on these minis, I am gonna protect them!
I say, they’re 100% right but what about the replacement cost incurred by damaging the minis beyond repair? What about the time you spend painting your minis just to see it being destroyed to improper storage and transportation?
Going through a bit of a hassle is always better than shoving your miniature figures in a box or plastic bag. It not only saves time and money in the long run but also some serious heartache of damaging a set of your favorite miniatures!