Tie-dye is usually done on pliable fabric such as cotton or linen, and the process involves folding and then binding the fabric in specific patterns to achieve different designs.
It might therefore seem that it would be impossible to tie-dye shoes as they are made of stiffer fabric, but impossible is a meaningless word when it comes to the art world!
If it can be imagined, it can be done, one way or another.
This article will take you step-by-step through the process of creating a tie-dye effect on your shoes, which is much easier than you might think!
Supplies Needed
- White canvas shoes
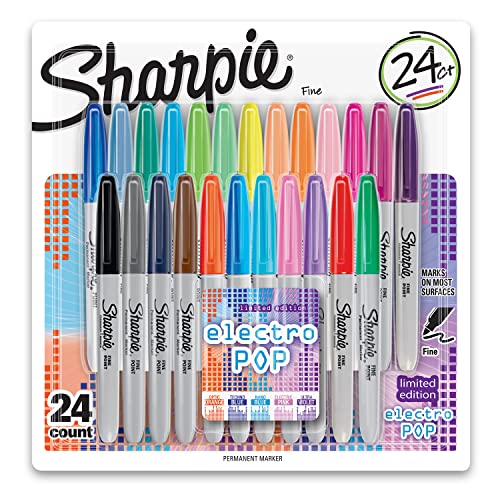
- An assortment of different colored Sharpie markers
- Rubbing alcohol
- Plastic syringe, dropper, plastic straw, plastic spray bottle, or smaller sized paint brush
- Paper towels
- Painters tape (optional)
- Blow dryer (optional)
The Best Type of Shoes for Tie-Dyeing With Sharpies
The best type of shoes for tie-dyeing with sharpies are white canvas shoes. You can find this type of shoe for cheap at places like Walmart or Target, or order them online.
1. Set Up Your Work Area
Tie-dyeing shoes with Sharpie markers isn’t a very messy process, but it’s always a good idea to protect your work space from stains when working with any kind of permanent colors.
You can cover a table with a disposable tablecloth or simply spread out an old towel to put your shoes on as you tie-dye them.
2. Tape the Soles of Your Shoes
Wrap the soles of the shoes thoroughly with painters tape. The tape will protect the soles of your shoes while you work and keep them bright and white.
You can skip this step if you’re not concerned about getting marker on your soles, or if you plan on coloring them in as well.
3. Create Your Design
Start with the lightest colored marker and work toward the darkest color.
You can create a classic tie-dye spiral design by beginning at the front top of the shoe near the toe and drawing three different colored spirals, making them wider as you make your way toward the back of the shoe.
The spirals should be the most narrow where they intersect near the center of the top of the toe area of the shoe.
Draw or sketch perpendicular lines across the three main spiral lines, making the perpendicular lines longer to widen the spirals as you move toward the back of the shoe.
The spirals don’t have to be super neat; they can be a little messy, and they don’t need to be entirely filled in – there can be some white spaces showing through.
The rubbing alcohol (next step) should help the colors to spread into the areas that aren’t completely filled in.
You can leave a gap of white between each color that widens along with the spirals. Fill in the white gaps with other colors, using the same sketchy, side to side strokes.
Make the same design on both shoes, or reverse the colors for a unique look.
4. Apply Rubbing Alcohol
Take your time when applying the rubbing alcohol, and apply small amounts to avoid making a mess.
You do not need a lot of rubbing alcohol to make the colors spread, so start with less than you think you need as you can always add more later.
With the dropper or syringe, apply the rubbing alcohol a few drops at a time. If you place the alcohol drops closer together, the colors will blend together more quickly.
The further the distance between the drops, the slower and more subtle the blending effect will be.
To use a straw to apply the rubbing alcohol, simply put your thumb over the end of the straw to draw up a small amount of rubbing alcohol, and then release your thumb to allow the alcohol to drip onto the shoe.
You can release your thumb quickly and then reseal the straw to control the flow of the alcohol, or just use the straw to suck up a little bit of the alcohol at a time.
You can also use a plastic spray bottle filled with rubbing alcohol to gently mist the shoes.
A paintbrush can give you more control over the application of the rubbing alcohol:
Simply pour the rubbing alcohol into a small dish, dip the paintbrush into the alcohol so that it is slightly wet, and then paint the alcohol over your design.
5. Let Your Shoes Dry
You can leave your shoes somewhere that they won’t be disturbed to let them dry overnight, or, if you really can’t wait to wear them, use a blow dryer to expedite the drying process.
How To Tie-Dye Shoelaces With Sharpies
To tie-dye shoelaces with sharpies you will need the same supplies that you use to tie-dye canvas shoes as well as white shoelaces, and a clipboard.
Tie-dyeing thick, flat shoelaces will be much easier and turn out looking better than using a round, thin shoelace.
Use the clipboard to stretch the shoelace taut, then draw your design on the shoelace, one small section at a time.
You can draw horizontal stripes or create wavy lines that meander down and around the shoelace. Use a dropper, paintbrush, or spray bottle to apply rubbing alcohol to the shoelace.
Allow your tie-dyed shoelaces to dry overnight, or use a blow dryer to dry them more quickly.
How To Seal Sharpie on Canvas Shoes
Sharpie markers are permanent markers, but they can fade over time when applied to canvas fabric, so it’s always a good idea to seal your Sharpie designs before wearing your shoes.
There are a few different techniques for sealing Sharpie on canvas shoes, including using Mod Podge, clear nail polish, or a waterproofing fabric spray.
Mod Podge
Mod Podge is a decoupage medium that can be used as a glue, sealer, or finish.
Mod Podge comes in many different finishes, including gloss, matte, satin, glitter(!), outdoor, a washable version designed for use by kids, a dishwasher-safe version, a furniture gloss, a puzzle sealer, a hard coat, and ones made specifically for use on paper or fabric.
Mod Podge Fabric dries to a clear, glossy finish, is permanent when dry, and can be machine washed in cold water, making this a great choice for sealing your tie-dyed canvas shoes.
Wait until your tie-dyed shoes are completely dry to seal them with Mod Podge.
You can use a sponge brush or a regular paint brush to apply the Mod Podge in thin, even layers across the entirety of your design.
Clear Nail Polish
Many people have used clear nail polish to stop their tights or stockings from running, but it can also be used to seal your canvas shoes.
Using clear nail polish to seal your tie-dyed shoes can take quite a while and can be challenging to apply.
To speed up the process, you can pour clear nail polish from the bottle into a disposable container, and then use a paint brush to apply the nail polish to your shoes.
Be sure to use a paint brush that you don’t care about reusing when using it with nail polish, as the polish can dry too quickly to remove from the brush, and using nail polish remover on paint brushes is not recommended.
As with Mod Podge, make sure that your tie-dyed shoes are totally dry before applying a coat of clear nail polish, and be sure to paint the nail polish on in thin, even strokes.
As a final piece of advice, have more than one bottle on hand so that you’re sure to have enough to finish the job. I recommend this 2-pack polish – great quality, great price, fast shipping.
Waterproofing Fabric Spray
You can use a waterproofing spray designed for use on clothing worn by backpackers and campers as another good way to seal your tie-dyed shoes.
You can also use the type of waterproofing spray that is made for use on outdoor fabric items, such as canvas boat tops, sunbrellas, and cushions for outdoor furniture.
Tips & Design Ideas
Feel free to be as creative as you like when designing your shoes. I thought I’d share a few tips for those newbies out there and those needing to get their creative juices flowing.
Be Mindful of Color Choices
Think about how the colors that are next to each other might blend and what new color combinations they might create.
A color wheel can be helpful when it comes to figuring out how to accurately mix colors.
Starry Night
Channel your inner Van Gogh, and create a Starry Night themed artwork on your shoes.
Make small swirls of varying sizes using a yellow Sharpie, and then use darker colors such as black, blue, purple, and green to fill in the rest of the shoes.
Once the shoes are dry, use Mod Podge to add glitter or gems to the center of the yellow swirls to make them sparkle like real stars!
Stripe It Up
Keep it simple with an easy striped design. Simply shade thick vertical lines of varying colors across the length of your shoes, then apply the rubbing alcohol and let them dry.
Wrapping It Up
Tie-dyeing white canvas shoes with Sharpie markers is fun and easy and can be enjoyed by adults and kids alike.
Most of the process takes around half an hour or so with the majority of time being spent on coloring in the shoes and then allowing them to dry, but don’t limit yourself to a certain timeline.
Take as much time as you need to get the look you were going for, and don’t be surprised if you find yourself wanting to do another pair right away! Yep, it really is that fun!


